So.........................
What do you do when your budget will not allow you to get new floors in a room where the floors desperately need to be changed?
Well you get down on your knees and pray
And while you're down there you grab a tin of paint - a roller - and a stencil.
Multi tasking ladies - it's all about multi tasking.
I first gave the floor 2 coats of a deep grey -with Behr patio and porch paint.
The floors were practically varnish free so I didn't even bother priming this time ( plus I was going with a dark color - I would never have attempted this with a light color )
NOTE: If there are traces of varnish on your floor you MUST prime - ( or remove it entirely )
AND you're only allowed to look at the floor - nothing else - because this entire room was/is a work in process ( that's still not quite finished by the way - but pic monkey takes care of that )
Between installing a plank wall - making built ins - shutter window coverings and the floor - I was all over the place in this room
Anyway I painted 2 coats - allowing each one to dry for 24 hours
You can purchase the stencil through Cutting Edge Stencil ( I was not paid to do this post but thought I'd provide a link in case anyone wants to attempt this ! )
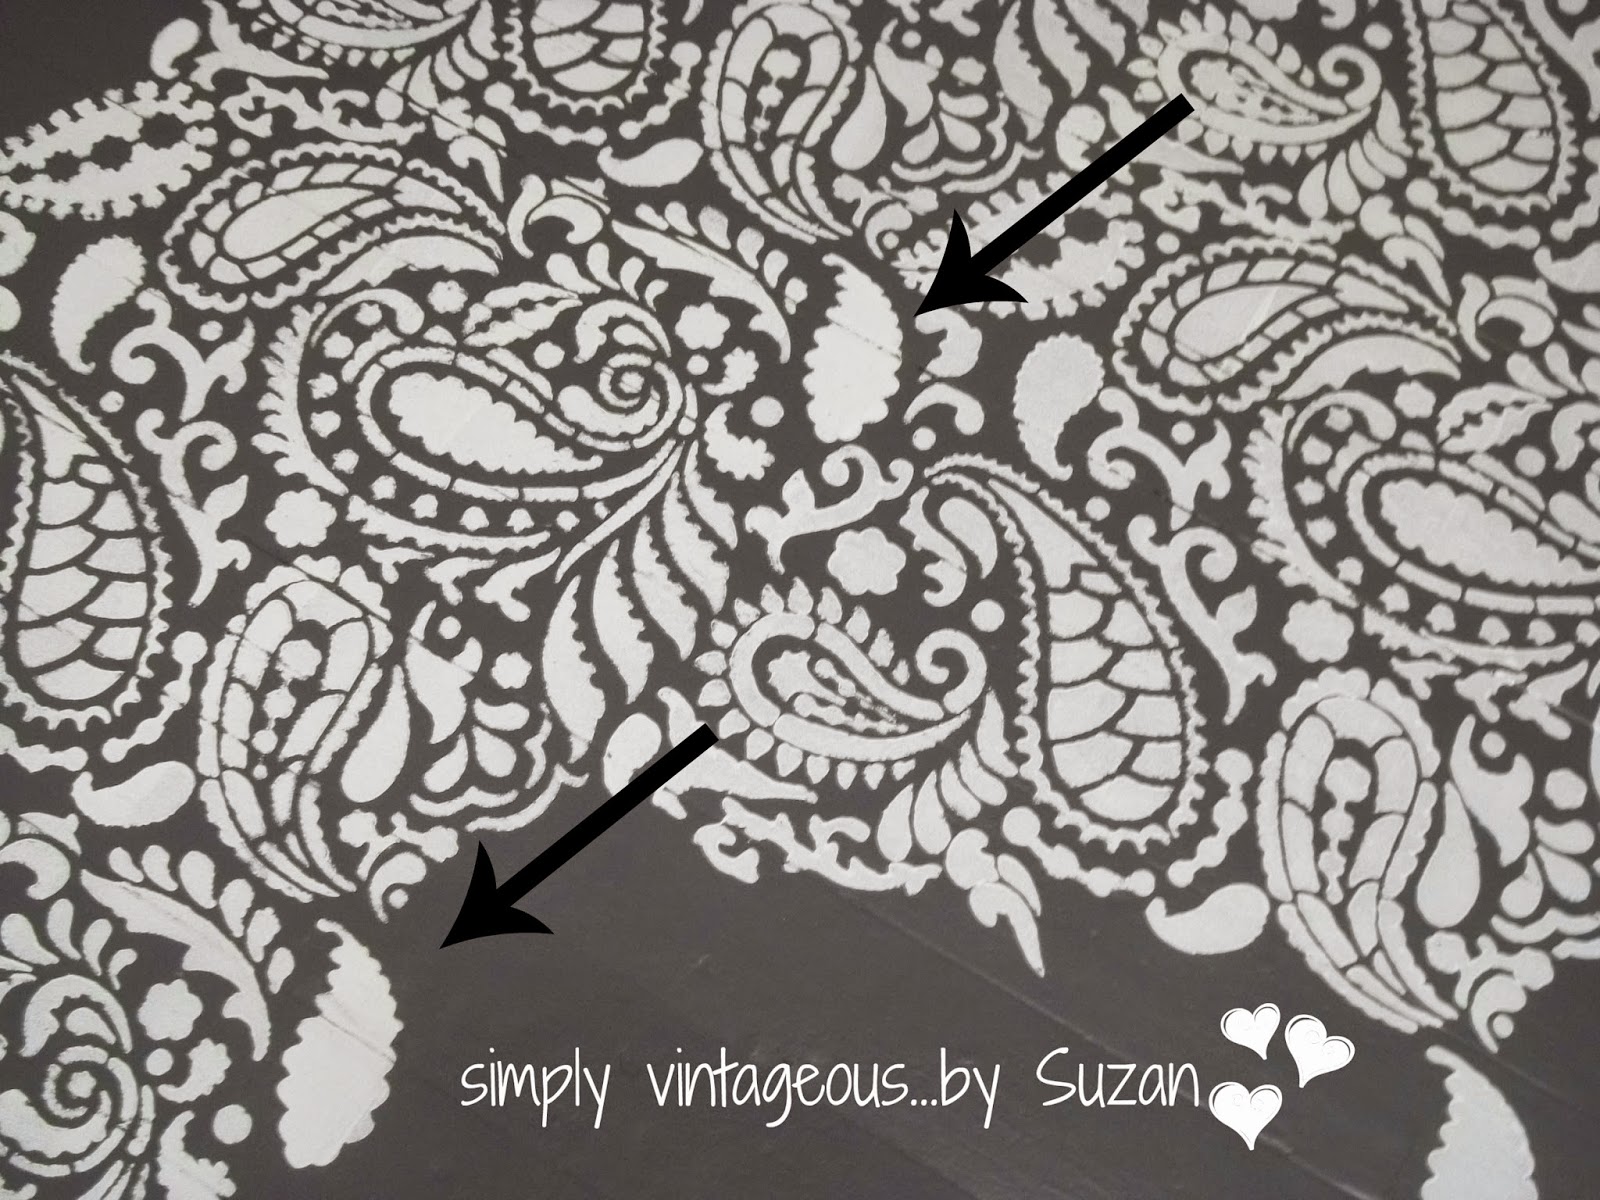
Here's the stencil ( s ) the large one - and the small one on top is to edge it off.
 |
| CUTTING EDGE STENCILS |
(You can see that the board seams almost disappear with the pattern)
Where I've indicated the arrows are where the " repeat " is for the pattern - simply placing the stencil so that part is covered allows you to continue on your next " stretch "
Like this
i
Now most people use craft paint when painting with a stencil -
I chose to use Behr Porch and Patio paint ( which is the only product I use when I paint floors )
So the paint was a little thicker -
To make sure I didn't get any bleed through - I would paint 1 section ( the size of the stencil ) and then hang it up to dry LOL
20 minutes or so and I was ready to use it again -
Also note, eventually the paint will get thick on the stencil - any paint - and it has to be washed ( otherwise it will compromise the pattern.)
Craft paint can simply be washed off with soapy water - what I did was peel it off - which was quite easy -
I'd scrape an end a little and simply peel it off in long strips
I only had to do this twice for the entire floor.
You don't have to have an ounce of talent to do this project - only patience.
Oh, and a stencil
and a small sponge roller and tray
roll out the
And scott towels or such to roll out even more of the excess
It probably took me a week or so to do this -
( mostly because I was working on other things in this fixer upper at the same time )
But I'm thrilled with the outcome
We've since added a white sofa ( Ektorp - Ikea ) into the space and I LOVE how the white sofa highlights the white paisley
Last night while we were watching t.v. in there
Suzan says - Don't you love the floor?
John says - You've asked me that at least 3 times every night since you finished
Suzan says - I have?
John says - Yes - and I keep telling you I like it
Suzan says - Well that's the problem then - it's not registering - you can't just like it John - you have to love it
We had to remove 2 layers of carpets - 2 layers of linoleum - and one layer of what appeared to be rotting cardboard and then scrape for days - what a sickening job these floors have been in this house - truly - I've never seen anything like it and I hope to never bear witness to anything like it again in my lifetime.............
Cost for this makeover:
Stencil - 54.95
Paint - ( grey - I had the white on hand ) 34.95
I put a coat of Polyurethane on top for protection - and that's it -
A lot cheaper than new floors, right?
We each have our own ottoman in front of the couch - I had to move one so that you could actually see the floor - the room's small so really only the edges show - but I'm still liking what little I get to see LOL
Have a wonderful day everyone !
Hugs,
From me to you

Looking for Inspiration?
Join me at these fabulous parties !
Savvy Southern Style DIY by Design Beyond the Picket Fence
Ivy & Elephants Too Much Time on my Hands Funky Junk Interiors
Have a Daily Cup of Mrs. Olson My Turn For Us Life on Lakeshore Drive
I Should be Mopping the Floor Uncommon Design Distressed Donna Down Home
Between Naps on the Porch Coastal Charm The Dedicated House
A Stroll Thru Life Sand & Sisal Stone Gable
Kathe with an E French Country Cottage Classy Clutter


