Showing posts with label Black. Show all posts

Monday, September 28, 2015

We DIY'ed Outdoor Shutters !

Good Morning everyone !

Out of guess what?
Fence Planks ( home depot must think we live on a ranch with acres of property to be fenced in )
Thankfully the one thing this house did have was a fenced in yard - in pretty good shape - so we haven't used one of them for their actual purpose lol


We've used them for our faux fireplace ( HERE )


I added them to a frame in a guest room ( HERE )


The kitchen island ( HERE )


A christmas tree ( HERE )


Made built ins in the den ( HERE )


And a plank wall that I can't find the post for.....................

And now?
DIY Outdoor Shutters !
These things are so expensive store bought....................we paid a lot of money for them 2 houses ago - just one pair cost over 300.00 and that was at least 10 years ago - I can't imagine what they charge today.
We made 2 sets for next to nothing !

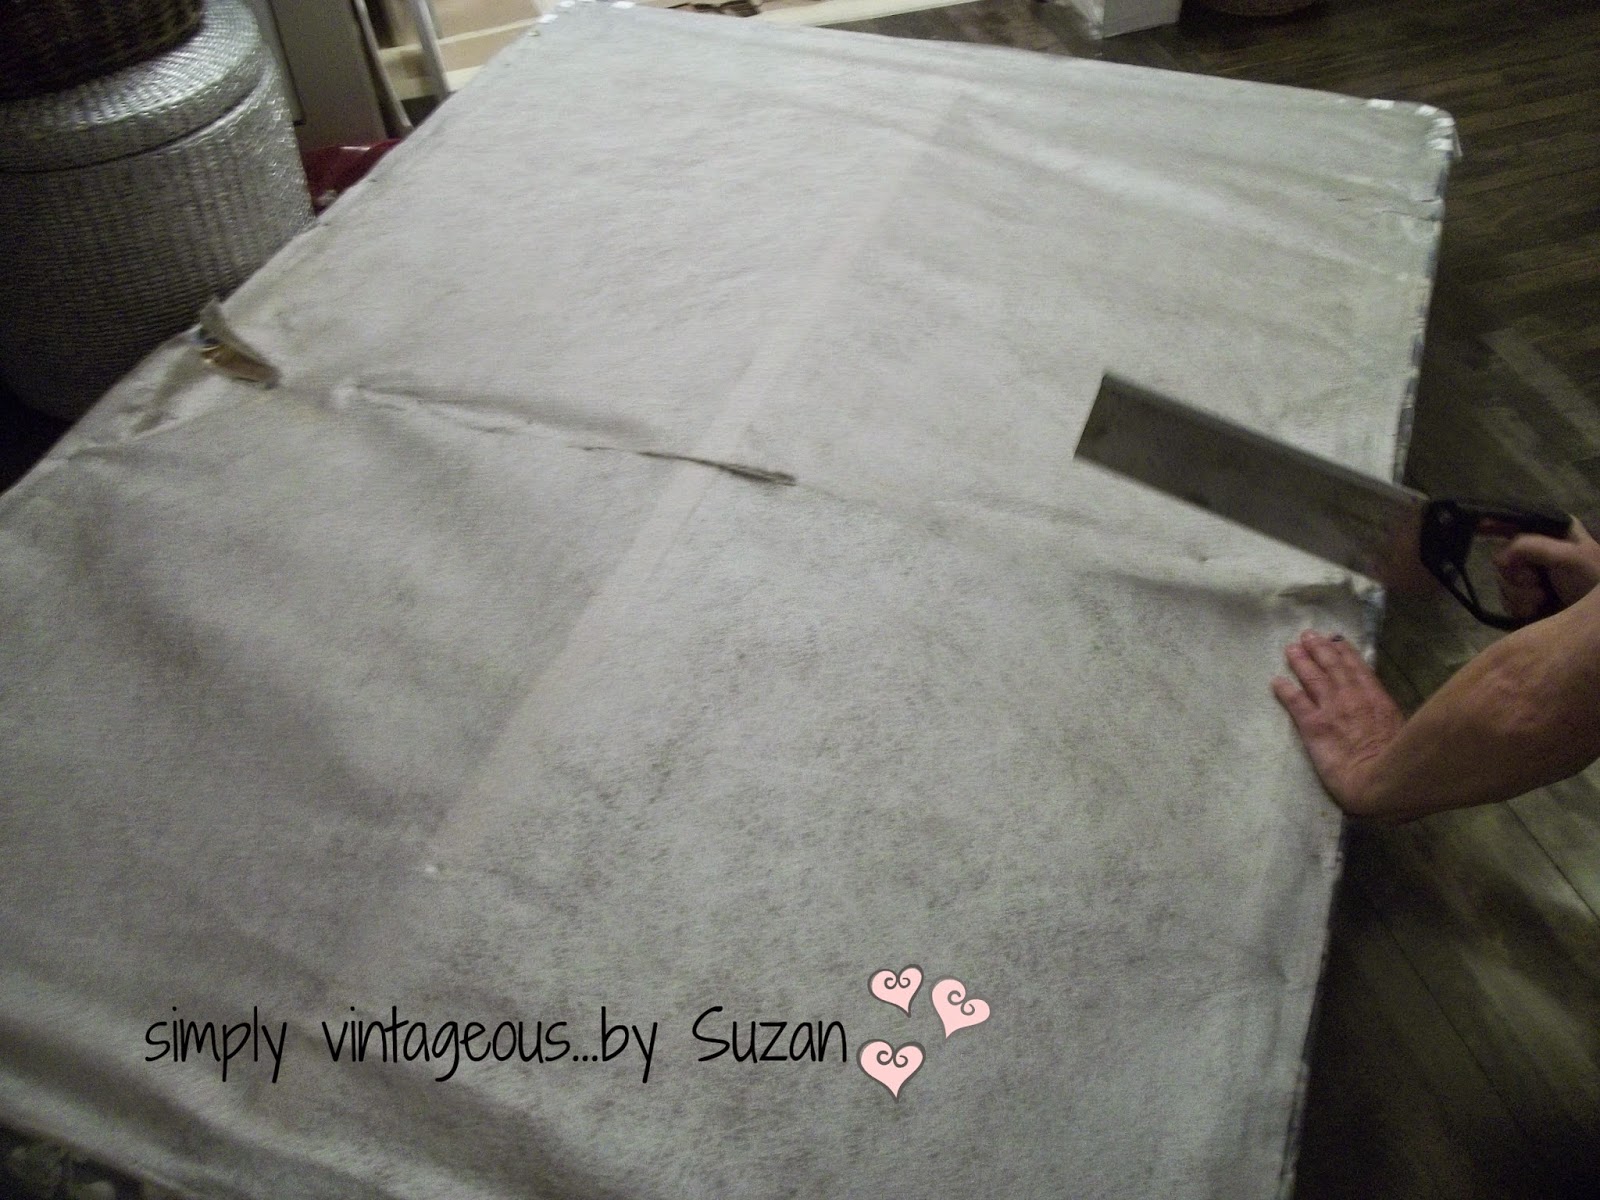
Each shutter took 2 planks - that's it ............... ( 3 would be more substantial but these front windows lead to the enclosed porch and the wall is not large so 2 were perfect for this project ) cut to the size of the window with the excess being used on the top and bottom to hold them together AND THAT'S IT !


I painted them black ( after painting the frame of the windows black - as well as the grid work )
Can I tell you that I will never wash these windows again?  They HAVE to be replaced - and anyone with old aluminium windows will know exactly what I'm talking about  - it took me hours and hours to get it done - they stick -they jam - they wobble - they're a.w.f.u.l. - BUT they do look somewhat better painted.
We haven't had much time to work on the front of the house - and it desperately needs work so I'm thrilled we've started !
Here's a close up of what they looked like


Isn't that U. G. L. Y  ( they ain't go no alibi ) ?
It was a sunny day working on them ( but a little crisp - Fall is here in Montreal  let me tell you ! ) and perfect drying weather


I painted the shutters ( and window frames ) with Behr Premium Ultra - Paint & Primer in one - exterior with a satin finish..............although I use Behr for all interior work I've never used it for outside - so I'm hoping it's a paint that endures..................


If you buy an old house here's a little advice you can take to the bank..................( well maybe don't take it to the bank or they'll never agree to you buying it in the first place - so maybe just take it to heart )
Measure each window - and each side of each window - do not make a template and cut them all down equally - even if every window looks the same.................you can't assume one side will be the same as the other - all 4 of these shutters are slightly different sizes - they did things differently back in the day lol !


Every job we start with this dump house I end up wondering what on earth I could ever have been thinking of - and then when it's finished I think...................." all it needs is love - da da da - all it needs is love love - love is all it needs "


And fence planks.


Such a cost effective way to implement big change, no?
( I should mention that I gave the front a fresh coat of white paint too )

AFFORDABLE DIY SHUTTERS

Now I have to finish the other side - and then the 2 side windows - and then all the rest of them -
only about - oh - 24 shutters to make..............
Still it's getting less and less embarrassing to come home !!!

EXTERIOR SHUTTERS FOR 10.00 A WINDOW

And I'm not even sure what's made the biggest impact - the paint - the shutters - or the fact that the windows finally were washed -  all I know is that these shutters cost aprox. 10.00 per window..................( we had to buy the masonry screws and the bit to go with it so a little more for us -  but we now have enough for all the windows )
Never has 10.00 gone so far ( with our home reno's anyway ! )
Each Cedar ( treated ) plank cost 2.50 - each shutter took 2 planks ( including the cross pieces )

BEFORE & AFTER WINDOW WITH DIY SHUTTERS

Have a wonderful day everyone !
Enjoy the Fall weather you've all been anxiously awaiting !
( I'm still wishing it was hot - the swimming pool is taunting me mercilessly )
And I've got to wash the windows on the other side - and paint them - and install shutters !
Hugs,
Me


LOOKING FOR INSPIRATION?
JOIN ME AT THESE FABULOUS PARTIES !

BETWEEN NAPS ON THE PORCH                            COASTAL CHARM
SAND & SISAL                                                     A STROLL THRU LIFE
CONFESSIONS OF A PLATE ADDICT                      MEMORIES BY THE MILE
AN EXTRAORDINARY DAY                                      KATHE WITH AN E
HOME STORIES A TO Z                                             FEARLESSLY CREATIVE MAMAS
FLUSTER BUSTER                                                       SAVVY SOUTHERN STYLE
REMODELAHOLIC                                                      THE CRAFTED SPARROW
MISS TOODY GOO SHOES                                        FUNKY JUNK INTERIORS
ONE MORE TIME EVENTS                                         LIFE ON LAKESHORE DRIVE
DIY SHOWOFF                                                            REDHEAD CAN DECORATE
DWELLINGS - THE HEART OF YOUR HOME          THAT'S WHAT CHE SAID
KEEPING IT SIMPLE                                                    CARRIE THIS HOME
MY SALVAGED TREASURES                                     LEHMAN LANE
I GOTTA CREATE                                                         LAMBERTS LATELY
LIVE LAUGH ROWE                                                     THE DEDICATED HOUSE
GRACE & GOOD EATS

Tuesday, February 3, 2015

Kitchen lights

John says - A couple of German helmets just arrived from Amazon.........................


Kitchen Island, Lighting, Black


John accidently shattered one of the ones we already had in the kitchen with a plank of wood 

Suzan says - Well if you hadn't broken one of the Kitchen lights I wouldn't have had to order a different set !
John says - Couldn't you have just replaced the one I broke ?
Suzan says - Nope - I don't want to be changing them every 6 months................these are indestructible.
John says - That's why they wore them in wars.

This is what we had 
But to be honest with you - being glass - and being in a small kitchen - they constantly had to be cleaned.


I feel like I have to keep letting everyone know that the word MANGE is EAT in French - not MANGE as in the disease LOL !!!
If any of you decide to visit Montreal - you'll think all the restaurants have a warning on their windows of an outbreak of MANGE LMHO !!!

Now I have to wait patiently for my Son to come and install the helmets

( War is hell on the home front too - and God only knows what a woman goes through..................)

And that song ?
When my Son was 6 years old he was obsessed with it - used to go to bed with a tape recorder listening to it - and if that's not aging myself I don't know what is !!!
THAT'S how we used to listen to personalized music LOL - long before the ipod was invented.

If anyone's interested, the lights were 39.99 each - so even if this whole vintage industrial thing is a trend - at least they don't cost an arm and a leg...................

What you can't see in the site's pictures is that they're " distressed " along the edges - revealing a little bronze color


that goes nicely with this newest project I'm working on !


Have a wonderful day all 
Much love,
Me


LOOKING FOR INSPIRATION?
JOIN ME AT THESE FOLLOWING PARTIES !


SAVVY SOUTHERN STYLE                                   HAVE A DAILY CUP OF MRS. OLSON
FROM MY FRONT PORCH TO YOURS                THE CHARM OF HOME
FRENCH COUNTRY COTTAGE                             MY TURN FOR US
MY ROMANTIC HOME                                          LIFE ON LAKESHORE DRIVE
I SHOULD BE MOPPING THE FLOOR                  BETWEEN NAPS ON THE PORCH
KATHE WITH AN E

Friday, October 31, 2014

Creating a bed nook.....( and overcoming obstacles )


DIY bed nook


John says - This is absolutely ridiculous -
John says - This is STUPID
John says - The room's too small - this is ridiculous
Suzan says - You already said that
John says - I can't believe you're hanging a curtain there - the room's small enough - this is absolutely ridiculous

3 times............................

GET.  OUT.  OF. THE.  ROOM.  PLEASE...................................
Obstacle no. 1 taken care of.
_________________________________________________________________________________

Now for the second one and this is huge - we couldn't get the box spring upstairs.
For the first guest room we were able to cut the box spring and fold it in half since it was a spring ( coiled ) one.
Assuming this would be the same, John began sawing away
( Yep - right through the gauze - don't ask - we had plenty to fight about last night - this didn't seem worth it at all )


You cut the 3 main pieces of frame like this


and then simply fold it over

John says - There's nothing " simple " about this
John says - I don't know anyone else on this earth that does this crap
Suzan says - Trust me - people do this - in fact a lot of people do this that live in little old houses
John says - WHY COULDN'T WE JUST PUT A SINGLE BED IN THERE FOR GOD'S SAKES?
Suzan says - Because a double fits in and I want to create a nook

Except -

Suzan says - Oh oh - there's no springs - we can't fold it in half because of all the wood slats
John says - Oh well - there goes that idea - we'll get a single bed - and he gets up to walk away
Suzan says - No way, Jose, we'll just cut the entire thing in half and then re-attach it upstairs - in place
John says - WHAT DO YOU MEAN  " WE'LL " JUST CUT IT IN HALF?
John says - I only see one of us with a saw in his hands
John says - I'm really at the end of my rope with all of your sick ideas
Suzan says - THEY'RE NOT SICK IDEAS !!!!!!!!!!
John yells - WHAT THE HELL ARE YOU DOING NOW?
Suzan says - taking all the fabric off to one side so you can remove those slats...............it'll be easier for you that way, trust me
John says - EASIER FOR ME????????????????????


They were just stapled in - so they were in fact quite easy to come off - here it is with all the horizontal slats removed


John says - THIS IS THE LAST TIME - DO YOU HEAR ME - I'M NOT DOING CRAP LIKE THIS ANYMORE
Suzan says - Aw c'mon - you just have to saw the 3 main piece of wood now and it's done

Here's how it looked when it was done

John says - I BASICALLY HAVE TO REBUILD THE BLOODY THING UPSTAIRS NOW
Suzan says - Could you please stop shouting?  You're giving me a headache
John says - YOU ARE A HEADACHE


It was incredibly light to carry upstairs LOL

We placed it on the bed frame and John reinforced where the 3 cuts were made


and then he nailed the slats back in ( I patched up where the fabric had been cut )
I only kept the fabric on the sides since the mattress is going to hide everything else..................everything else was cut up and thrown out

Obstacle no. 2 taken care of


A bed skirt would have been difficult - ( plus I didn't have one LOL ) so I cut up a drop cloth - folded it in half - and stapled it along the edge of the slats


Obstacle no. 3 - done !
And there you have it -
By hook or by crook - I've we've created a nook !!!

DIY bed nook

This tiny little space took me over a week - not the room - just the nook - so that's all you're going to see
( and by the way the entire room is basically double the size of this -

The " curtain " is a duvet cover I had on hand ( you can see that post HERE )
Did you notice that little window?
I put the matching pillow case on it - I can fold it to whatever size I need ( shorter in the day ) again I didn't cut the sham at all - just simply folded it - the top part of the window only shows roof lines and tree tops so I didn't think it was necessary to cover that part ( unless there's a chimney sweep in the area, it's perfectly safe)
 I also painted a frame around the window to give it a little more substance


It's not easy getting photos of this small area, let me tell you but I'm going to do my best to show you
" around " lol

I added a mirror to my wood plank " glam " frame - and installed 2 reading lamps on the wall -


A picture of the Eiffel Tower - and benches that I actually used to read on once upon a time !!!
( and fell asleep on one sunny beautiful afternoon )


The mirror is painted white and distressed ( a long long time ago )

And I guess that's kind of it .................almost ready


DIY bed nook

but not quite


John says - Why do you always work a$$ backwards?
Suzan says - I don't !!!
John says - You've decorated half the room - and you still have to paint the floor on the other side
Suzan says - It gives me hope when I can look up and see the other half done

He doesn't even realize I've only painted half the ceiling also LMHO

Oh and here's the seller's photo from MLS and how it looked when we visited the house


Later on in bed...................

Suzan says - Maybe our next place should be a loft
Suzan says - You're becoming quite the carpenter you know
John says - The next time I move it'll be in a pine box
John says - In fact - that may be the next project I work on.....................

Have a wonderful day everyone - and weekend for that matter.
I'm praying I'm finished this room by the end of it -
Please don't let it take another week

Much love,
Me 

Looking for inspiration?
Join me at these fabulous parties !

Be Different Act Normal                                              One More Time Events
Life on Lakeshore Drive                                               It's Overflowing
DIY Showoff                                                               I Should be Mopping the Floor
Uncommon Design                                                       My 1929 Charmer
Distressed Donna Down Under                                    Between Naps on the Porch
An Extraordinary Day                                                  Kathe with an E
Homestories A to Z                                                     Elizabeth & Co.
The DIY Dreamer                                                       Savvy Southern Style
Beyond the Picket Fence                                             Adorned From Above
DIY by Design                                                            Have a Daily Cup of Mrs. Olson
The Dedicated House                                                  French Country Cottage
The Charm of Home                                                   Too Much Time on My Hands
My Turn for Us                                                           My Romantic Home
Miss Mustard Seed                                                     Remodelaholic
Coastal Charm                                                            A Stroll Thru Life
Stone Gable

Saturday, October 18, 2014

Scroll work and a bed frame

Good morning everyone

Last week I mentioned that I had changed my mind about making the second little room into a dressing room - and had decided instead to go with a second guest room. I showed you some options for bed frames I had found online - none of which I was able to get for one reason or another.................but I did find this one.


It's nothing at all of what I had imagined - but it'll do - and I DO happen to like the curves and  scroll work which will tie in ( kind of, sort of, maybe ? )  with this small dresser I'll be using as a night table

Transferring an image on a dresser

The scrolls were transferred on using a transfer from the The Graphics Fairy and later darkened with a sharpie.....................


It served as my end table in our last place and I was thinking of freshening it up and selling it - now it'll be staying with me a little longer since it's the perfect size for a lamp and a few books.

This is how it looked before

Transferred image on dresser

You can see the tutorial for the transfer  HERE

Meanwhile I haven't stopped painting in that room for 3 days - and it's only going white
( with one deep grey accent wall which you can't see in this photo )
The first 2 coats barely covered - I'm on the 3rd and it's looking a little cleaner now
And as much as I love the little windows I can't tell you what a pain they are to paint !!!
( much scraping involved - I'll just say that - there's paint on the glass panes that I swear to you has to be 50 years old )


This room's the brighter of the 2 guest rooms because it has a small sash window on the other side of as well.................( where the deep grey will go ) and the bed will be placed in a sort of nook on that side ( made to measure almost )

And that's what I've been working on non stop now.....................before moving on to the offce ( and final upstairs room )

I'm determined that it'll be finished before we hit our first year " anniversary " in this place.

The first guest room was done with particular little princesses in mind


You can see it HERE - but this one's going to be all grown up - not fluffy at all
All white - with black accents ( much like my room now that I think of it )


Before and after my room is HERE

Okay - gotta run before the paint dries on the roller ( AND I change my mind about the whole thing again )

Come, let's scroll  ♪
Scroll across the floor
Come, let's scro oh oh ll  ♪♫
Scroll across the floor
Now turn around baby.......................

Let's scroll once more   ♪♫♪


Have a wonderful day everyone -
Much love
Me

Looking for inspiration?  Join me at these fabulous parties !

I Should be Mopping the Floor                                 Between Naps on the Porch
Coastal Charm                                                           Sand & Sisal
A Stroll Thru Life                                                      Cedar Hill Farm House
An Extraordinary Day                                               Kathe with an E
The DIY Dreamer                                                    Savvy Southern Style
Beyond the Picket Fence                                          Ginger Snap Crafts   
Adorned From Above                                              Have a Daily Cup of Mrs Olson
Ivy & Elephants                                                From My Front Porch to Yours
My Romantic Home                                                 One More Time Events
Life on Lakeshore Drive                                           My Turn for Us
Miss Mustard Seed                                                  Elizabeth & Co.